In this Quickstart, we'll set up MoonPay's Swap widget, directly within your browser. Independently of your experience level, this guide will lead you through all the essential steps, swiftly enabling you to swap between crypto currencies.
In this tutorial, you will configure the Swap widget in a local environment
Create a new folder for code
Initialize the widget in a file using HTML and JavaScript
Edit the widget parameters
Display the fully functional widget locally in your browser
Before beginning, you will need:
A MoonPay account: If you do not have one, set one up through the MoonPay Dashboard.
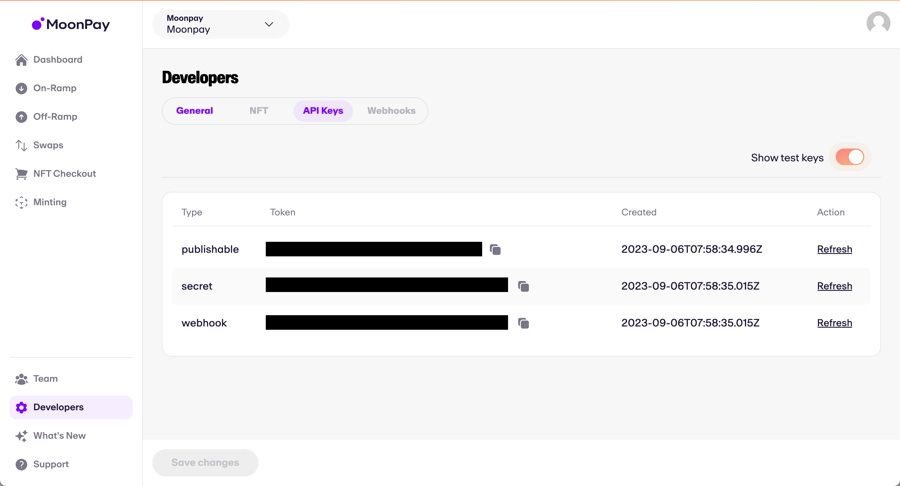
Once logged in, navigate to the Developers tab on the sidebar → API Keys.
Here, you will be able to copy your API keys. In this tutorial, we will be using the publishable test key.
The code below will embed our Software Development Kit (SDK) directly into your HTML by way of <script> tags.
You can think of this as a way of injecting code directly into HTML without having to create a separate linked file
<!DOCTYPE html>
<html lang="en">
<head>
    <meta charset="UTF-8">
    <meta name="viewport" content="width=device-width, initial-scale=1.0">
    <title>MoonPay Integration</title>

    <!-- Adds the MoonPay SDK as a script to your HTML file -->
    <script defer src="https://static.moonpay.com/web-sdk/v1/moonpay-web-sdk.min.js"></script>

    <!-- Initialize the MoonPay SDK immediately upon page load -->
    <script>
        document.addEventListener("DOMContentLoaded", () => {
            const widget = window.MoonPayWebSdk.init({
                flow: "swap",
                environment: "sandbox",
                variant: "overlay",
                params: {
                    apiKey: "pk_test_123", // Replace with your MoonPay publishable API key
                    baseCurrencyCode: "eth",
                    quoteCurrencyCode: "usdc",
                }
            });

            // Open widget
            widget.show();
        });
    </script>
</head>
<body>
    <div class="container"></div>
</body>
</html>
This script will detect when the HTML page loads and immediately run the JavaScript within the <script> tags when the load has finished. Remember to replace pk_test_123 with your publishable API key from Step 1.
You can customize widget functionality (currencies, amounts, etc.) by adding and removing parameters in the JavaScript, whilst still preserving proper formatting.
All parameters can be found on this page of our documentation.
For example, if we would like to display the widget with a default of 0.02 ETH worth of BTC, we could modify the JavaScript like such:
The first step of processing a test swap using the MoonPay Swap widget is to make sure that environment is set to"sandbox", as shown above in the example code. This puts your widget in test mode.
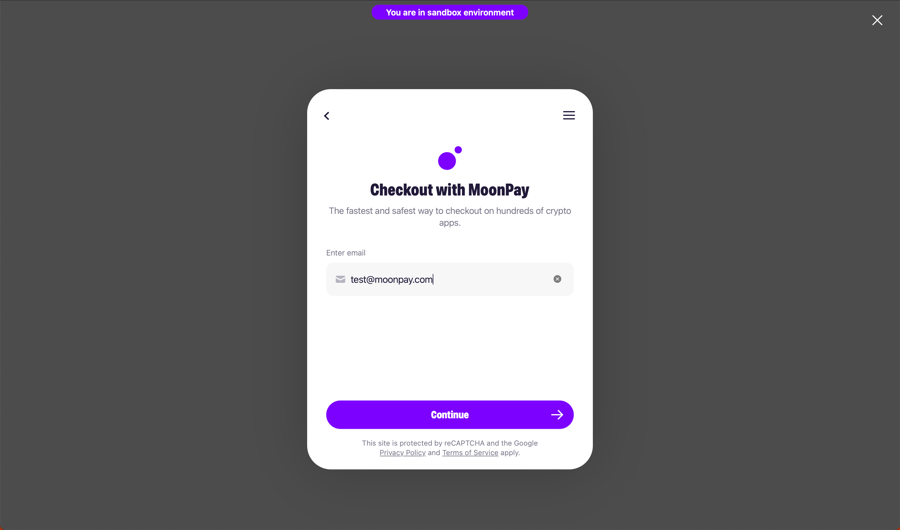
Next, you'll see the Swap widget with your configured defaults. Click on Use WalletConnect to connect your source wallet.
Next, click on Continue and enter your email address to log in.
Next, you will be asked to enter the destination wallet address. If you already have existing wallet addresses with MoonPay, they will show up here. Any wallet address will work for a test transaction.
Then, you will see an order confirmation screen with the summary of your order. Clicking on Swap ETH → BTC creates your swap order with MoonPay.
Finally, you'll be presented with the widget's transaction tracker screen where you'll be able to send your crypto to MoonPay so we can swap it for you.
Congratulations on successfully integrating MoonPay Swap! 🎉
There are more ways ways to incorporate this widget into your products to provide your customers with a crypto swaps product. If you're interested in exploring alternative integration methods with MoonPay, please refer to our Integrations (SDKs) page.
If you have any questions, visit our Help Center to dig into our other resources or drop us a line!
Updated 4 months ago
Table of Contents
Overview
What you will accomplish
Prerequisites
Implementation
Step 1: Set up a file for your integration
Step 2: Retrieve API keys from the MoonPay Dashboard